Sunday 22 January 2017

Mixed Media Canvas by Elisa Ablett

Hi Crafters,

Another gorgeous Summer's Sunday here where I live on the coast, what's it like where you live today??

Just sharing my blog post which featured on the Colour Blast Blog today - 

It's a bit of a sad post today because it's my last for Colour Blast for the moment as I take a step back to let some different ladies inspire you all. I'm sure I will see you all around on social media, don't forget to visit my blog - http://2crazycrafters.blogspot.com.au/ to subscribe and keep up to date with my next ventures. Thanks for all the love over the last year xx

Now onto my final post, you know me always creating something different so I decided on a Mixed Media canvas showcasing the Colour Blast Pastes on Acetate and other mediums!!

Here is my Canvas - 


Tutorial Time !! πŸ˜€πŸ˜€


Step 1 - Grab your fairy wing stencil (or chosen stencil, my one is a Crafters Workshop Stencil) and a couple of awesome Colour Blast Colour Pastes ( Deep Water and Fire Engine) spread your inner colour paste first using the palette knife and then the second colour to finish. Wait to air dry (for acetate) then cut around your acetate wings, ink around the edges in black ink and put aside.


Step 2 - I hand dyed a few pieces of medical gauze available from any pharmacy with Colour Blast Shimmer Dust in Lollipop, make up a diluted solution of the Shimmer Dust with water, then dip your gauze in and squeeze liquid out, Let air dry :-) 


Step 3 - Die cut a frame out of white cardstock, spray the frame with Colour Blast Colour Shimmer Spray in Just Blue and then using a paint brush while the frame is wet, add a bit of the Colour Blast Shimmer Dust in Navy with a paint brush, I just added the Dust undiluted to the wet parts of the frame.


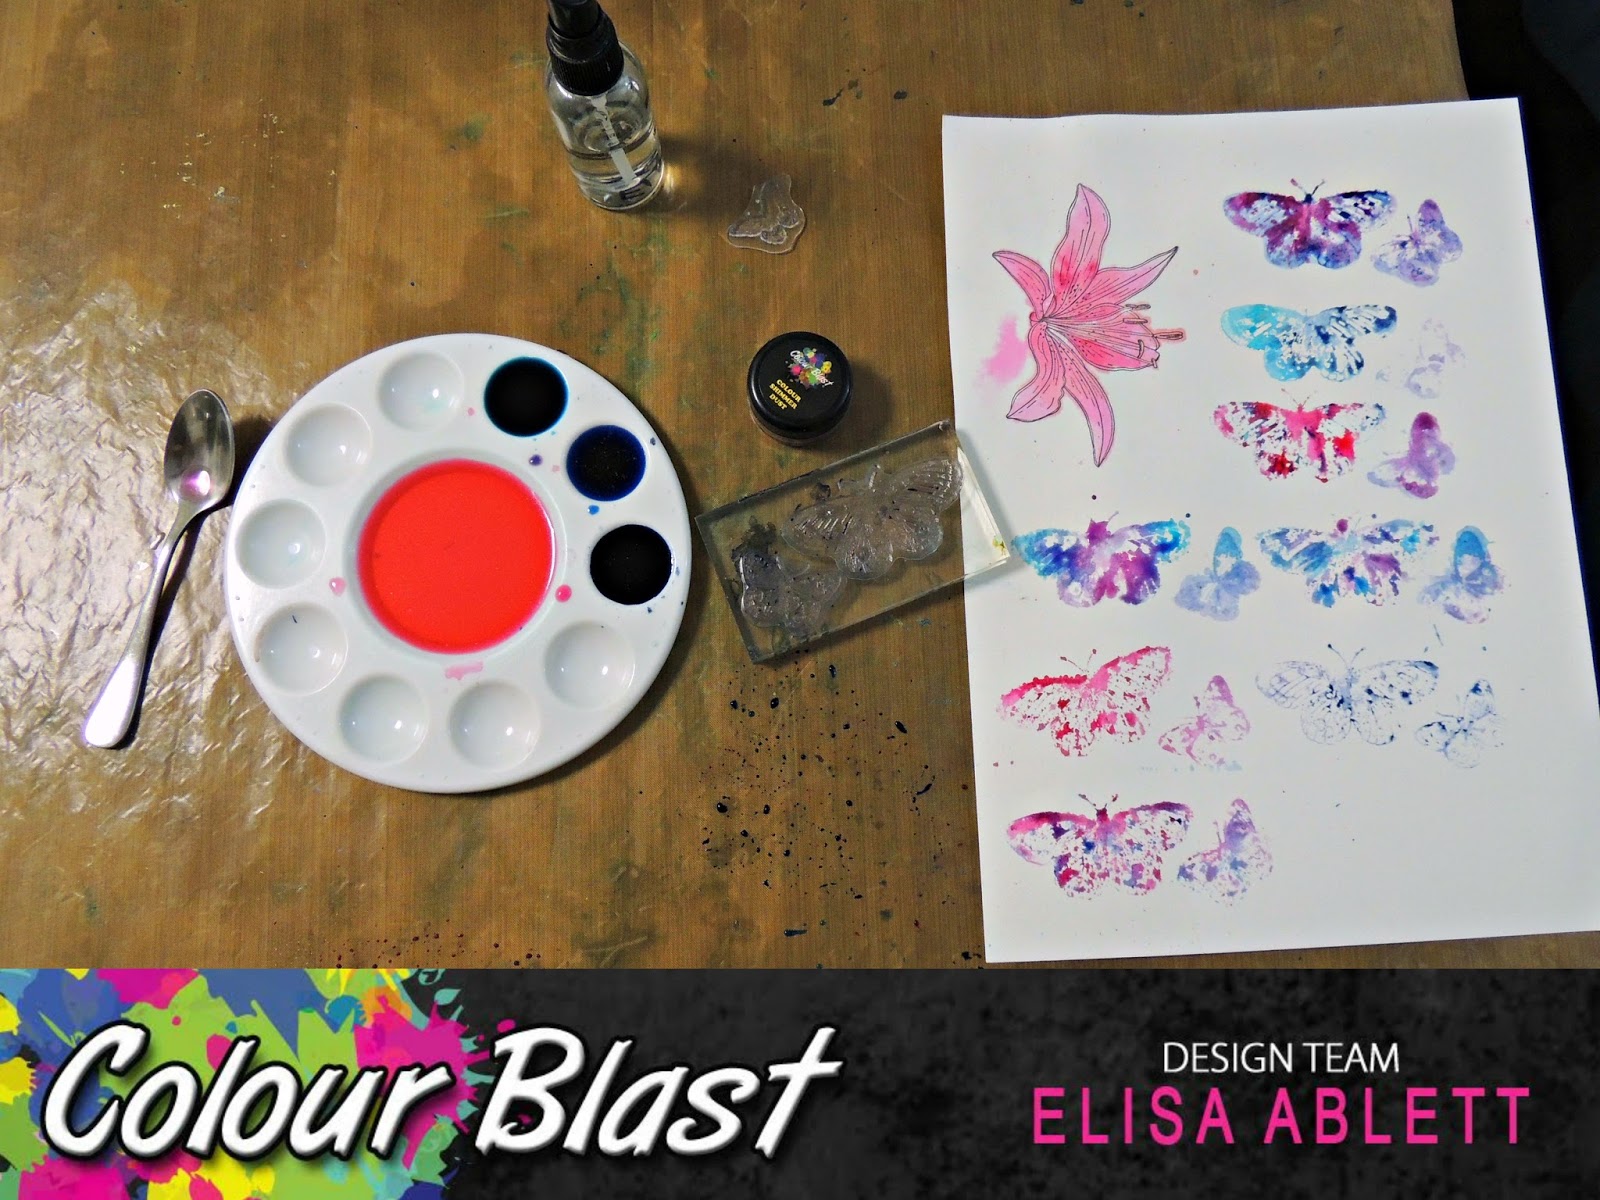
Step 4 - Using small amounts of diluted Shimmer Dusts (Lollipop, Navy and Peacock) on a craft mat, stamp butterflies onto watercolour paper, do several layers of colour on each butterfly image. Wait to dry then stamp the butterfly images again over the top in Versamark Black Ink, dry then cut them out.


Step 5 - I used a small canvas which was already prepped with gesso. I sprayed the canvas with water the using a paint brush I started to add my chosen base colour - Colour Blast Shimmer Dust in Peacock. Keep adding colour and spray with extra water where needed.

While it was still wet I added my two extra colours  - Navy and Lollipop Shimmer Dusts

To get an extra depth of colour, I added a small amount of Shimmer Dust crystals directly to the wet surface of the canvas using the end of pointy palette knife, you do not need to add too much but it will give you gorgeous patterns and vibrancy of colour.


Step 6 - Once your canvas is dry, stamp onto your canvas with versamark black ink pad and your chosen stamps, I also inked around the edges of the canvas with the black ink.


Step 7 - Once your stamping is dry, you can now add your first layer of stenciling (circles) with Colour Blast Colour Paste in Deep Water


Step 8 - Second layer of stenciling ( lines)  - Colour Blast Paste in Dusty Charcoal


Step 9 - Third layer of stenciling (small dots) in Colour Blast Colour Paste in Fire Engine and some lovely black splatters of Colour Blast Colour Spray in Roadbase


Step 10 - Last step is to add splatters of watered down Heavy White Gesso

Let your canvas dry thoroughly before adding your last details.

1. Glue down your torn up gauze and extra threads
2. Glue your blue frame to the bottom left hand corner of the canvas
3. Glue the middle of your acetate fairy wings to your photo and then using 3D foam dots to glue your fussy cut photo to the canvas situated over the blue frame.
4. Glue your butterflies to the canvas i situated mine over the top of glued gauze
5. Add your quote or saying
6. I also added some lovely teal dots with Nuvo Crystal


Here are some close ups!!


And you are finished! 

Thanks for stopping by the blog today, make sure you leave me some goodbye love :-) 

Don't forget to visit my blog http://2crazycrafters.blogspot.com.au/ to subscribe and keep up with my future posts and ventures.

Thanks again.

Elisa xx 😍😘


Sunday 8 January 2017

Caution: Extreme Awesome by Elisa Ablett

Hi Shop and Croppers,

Elisa here from the design team for Shop and Crop Scrapbooking with a second layout using the awesome boy collection from Simple Stories called 'So Rad'. This layout featured on the Shop and Crop blog on the 7 January 2017 and i wanted to add it here as well!! 

Such an awesome collection for all boy layouts. Loads of papers and elements to use!

This time around i wanted to add a few more mixed media touches to my layout, including adding Colour Blast Dusty Charcoal texture paste and splatters of Tangareen Dream and Deep Water Colour Blast Shimmer Sprays.

Here are some links to the shop

Shop and Crop Scrapbooking So Rad Collection

Shop and Crop Scrapbooking Colour Blast Products


Here are some close ups for the extra detail!


Thanks for stopping by the blog today.

Elisa xx


You are Capable of Amazing Things By Elisa Ablett

Hi Crafters,

My turn up on the Colour Blast blog today with a bright and vibrant yet grungy boy mixed media layout.

Sometimes when you pick up a photo and you realllly want to scrap it but the colours seem to bright and all over the place and perhaps you have a bold pattern or some distraction in the photo. I used to stress about it, perhaps i'd even print it in black and white to help myself out BUT I made the decision that with mixed media you can use those bright colours and bold patterns in your photo to create the perfect background to match....so that's how I'm rolling these days.

With the photo that I used you can see the bold green and yellow graffiti in the background plus not to mention his bright Carribean blue shirt so those are the colours i decided to concentrate on..plus a bit of black to grunge it up in honour of the graffiti feel to the layout.

Here is the finished layout.


Here are some close ups so you can see the details a bit better.


Let's get started on the tutorial!


Step 1 - Draw a rectangular frame in the centre of your page with a black waterproof marker, then go over the top of the black frame with a masking fluid pen or fine applicator. Masking fluid is a fantastic tool to add to your Mixed Media creations, you can block colours with it very easily..


Step 2 - Add a small amount of Colour Shimmer Dust in Paris and Lush to a paint palette tray and then add a small amount of water. Using a spray bottle of water and a paint brush add colour to your blocked area. I sprayed the area first with water and then added splashes of colour here and there, I also added after it had dried, a bit of Sunshine Colour Shimmer Spray by dipping a clean paint brush into the spray bottle and dripping it onto the coloured area.


Step 3 - after the coloured area has dried completely, you can remove the masking fluid barrier simply by rubbing it with your finger and lifting it up and off. I then used a lovely circle stencil and traced the lines and the circle over the top of the coloured area.


Step 4 - Add some Dusty Charcoal Colour Paste with a palette knife and stencil in places over your layout.


Step 5 - Grab your selected  Colour Sprays and Colour Shimmer Sprays and spray your selected embellishments, I have used an old set of Resist chipboard stars that come packaged plain and then you colour them yourself...


Step 6 - Add some more Colour Blast Paste in Sunshine


Step 7 - Add some grungy stamping with a black versafine ink pad after the Sunshine Paste has completely dried. Then add another laying of stenciling using Colour Paste in Apple of My Eye.
Dry thoroughly and then add your last touches to the layout.

A few extra details at the end to put your layout together:

1. spray water at the top edge and add a few drops of Carribean Colour Spray and spray water over the top of the colour and let drip down into the middle of your page, only a small amount, once dry do the same to the bottom edge.
Colour Sprays - Carribean

2. Add some more grungy stamping using a black archival ink pad
3. Add some black splatters using Roadbase Colour Spray.
Colour Sprays - Roadbase

4. Glue your photo and background papers down with a little bit of black cotton underneath them
5. Add your title and coloured stars and Heart embellishment. Glue them down.

You are now finished, woohoo! 

Hope you have enjoyed this tutorial.

Thanks for stopping by the blog today, make sure you leave some love ...


Elisa xx


Thursday 5 January 2017

BMX Bike by Elisa Ablett

Hi Crafters,


Just sharing my latest design team layout created for Kraft Plus Challenges January Challenge.

As soon as I saw this challenge graphic i knew i wanted to use a photo of my son on his bmx bike, the photos i took of him completing his first heart stopping ride on the huge hills at the local bmx track.

I wanted the layout to look colourful and explosive!

Here is the link to the January Challenge over on the blog.


I recently found my old Making Memories foam stamps the other day when i was cleaning my craft room and decided to dust them off and use them in a more modern way... with some neon green paint.

Here are some close ups! 


Here is the January Challenge, I got my inspiration from the bike and that's pretty much it! this graphic is way pretty with a cruisy beachy feel about it but my brain went in another direction once i saw the photo i wanted to use!!.

Thanks for stopping by the blog ... make sure you leave some love :-) 
Elisa xx

'Frosty' by Elisa Ablett

  Hi Crafters, Elisa here from the design team for Ink Art Designs with the first of my 'Christmas in July' projects. For this proje...